

Home
•
Sew in Style
•
DIY Fabric Binder Cover | Turn an Ordinary Binder into Something You’ll Love to Carry

DIY Fabric Binder Cover | Turn an Ordinary Binder into Something You’ll Love to Carry
There’s something satisfying about taking an everyday item and making it completely your own.
Whether you’re getting ready for a new school year, organizing recipes at home, keeping quilting notes together, or creating a thoughtful handmade gift, a fabric binder cover is an easy way to transform an ordinary binder into something uniquely yours.
The best part? There are endless ways to personalize it.
Choose a bold print that reflects your personality, stitch decorative accents around the edges, embroider a favorite quote or monogram, add a school subject like History or Science, or even applique a fun design to the front. No two binder covers have to look alike, and that’s exactly what makes this project so much fun.
Today we’re kicking off Project #1 of our Sew in Style Back-to-School Sewing Series, and we think it’s the perfect way to start.
Designed for Every Skill Level
This project is beginner friendly while still offering plenty of opportunities to get creative.
You’ll learn how to create a soft, padded binder cover with inside pockets that securely hold your binder in place. The pattern includes two different style options:
Classic Solid Cover – perfect for showcasing a favorite fabric print.
Two-Tone Cover – combine coordinating fabrics for a custom look with a contrasting spine.
Both styles follow the same simple construction, so you can choose whichever fits your style best.

Make It Your Own with Embroidery
One of our favorite parts of this project was adding custom embroidery using the NECCHI NE210 Sewing & Embroidery Machine.

For our sample, we designed the embroidery using Artist Toolkit, the complimentary embroidery software included with NECCHI embroidery machines.
We combined:
- Built-in fonts from Artist Toolkit
- A purchased applique embroidery design from Etsy
- Custom layout and sizing
Once everything looked just right, we simply clicked Cloud Upload from our computer.
Within seconds, the design wirelessly transferred directly to the NE210.
No USB drive.
No extra steps.
Just design, upload, and start stitching.
It’s one of those features that quickly becomes something you never want to sew without.

Decorative Stitches Add Even More Personality
Embroidery isn’t the only way to customize your binder.
The NE210 also includes a beautiful selection of decorative stitches that can instantly add texture and personality to any project.


For our cover, we stitched decorative accents along the spine and cover seam to give the binder even more character.
Small details like these take only a few minutes but completely change the finished look.
Materials
You’ll need:
- Quilting cotton or similar woven fabric for your front and back cover
- Coordinating fabric for the spine (optional)
- Coordinating fabric for the inside liner (this fabric won't be seen)
- Coordinating fabric for the inside pockets
- Fusible fleece (recommended) or heavyweight fusible interfacing
- Thread
- Iron and ironing board
- Rotary cutter or fabric scissors
- Sewing clips or pins
- NECCHI NE210 Sewing & Embroidery Machine (or your favorite NECCHI sewing machine)
Fusible fleece is especially beginner-friendly because it gives the cover a soft, padded finish without needing additional batting.
Step 1: Let’s Get the Perfect Fit
No guessing. No complicated math.
Our free Binder Size Calculator makes it easy to create a custom-fit binder cover for almost any binder size.
Enter your email below and you’ll receive instant access to the calculator, plus we’ll send the link to your inbox so you can return to it anytime. While you’re there, you’ll also receive updates whenever a new project is released in our Sew in Style Back-to-School Sewing Series.
👇 Fill out the quick form below to begin.
Step 2: Choose Your Style
Now comes the fun part.
Will you make…
Classic Cover
One beautiful fabric wrapped around the entire binder.
Perfect for showing off your favorite print.
OR…
Two-Tone Cover
Add a contrasting spine for a more custom designer look.
It’s a small detail that makes a huge difference.
Both styles sew exactly the same after this step.

Step 3: Cut Everything Out
Using the measurements from the calculator, cut:
| Classic Cover | Two-Tone Cover |
|
• 1 - Solid Outer Panel Fabric • 2 - Pocket Fabric • 1 - Lining • 1 - Fusible fleece |
• 2 - Outer fabric Panels • 1 - Spine fabric • 2 - Pocket Fabric • 1 - Lining piece • 1 - Fusible fleece |
If you’re using fusible fleece, you’re going to love how soft and professional the finished binder feels.
It’s one of my favorite beginner-friendly stabilizers because it gives beautiful structure without making the project bulky.
Step 4: Time to Personalize!
Before we start assembling anything…
Let’s make this binder yours.
This is the perfect time to:
✨ Embroider a name
✨ Stitch a monogram
✨ Add an applique
✨ Sew on a patch
✨ Quilt the front panel
✨ Try decorative stitches
Behind the Scenes

For our binder, we used the NE210 Sewing & Embroidery Machine.
The applique design came from Etsy (link here) while the lettering was created directly inside Artist Toolkit, the free embroidery software included with NECCHI embroidery machines.

One feature we absolutely love?
Once our design was finished, we clicked Cloud Upload, and within seconds it wirelessly transferred straight to the NE210.
No USB drive.
No hunting for files.
No extra steps.
Just click…and stitch.
Step 5: Let’s build the outside cover
If You’re Sewing the Two-Tone Version…

With right sides together, sew the front panel, spine, and back panel using a ¼” seam allowance.

Give everything a good press, and suddenly your binder cover starts taking shape.

Tip: If your cover features a dark and light fabric, press your seams to the dark fabric.
(Classic cover? Skip ahead to step 6!)
Step 6: Add the Structure
Fuse your interfacing to the wrong side of the outer cover.

Leave about a ¼-inch border around the edges instead of fusing all the way to the seam.
That little trick makes turning your project much easier later.
Step 7: Prepare the Pockets
These simple folded pockets are what hold your binder securely in place.

Fold each piece in half, wrong sides together, making sure the height of your binder side is the long side,

Press along the fold and topstitch along the folded edge.
Done.
They’re surprisingly satisfying to sew.
Step 8: Build Your Binder Sandwich
Now everything comes together.
Lay down:

Outer cover (right-side up)
↓
Pocket pieces

↓
Lining (Right side down)
Take a second to line everything up before pinning into place.
Step 9: Sew Around the Outside
Stitch all the way around, leaving a small opening (3-4") so we can turn everything right-side out later.
Tip: Do not place your opening along a pocket edge, this will make it difficult to close your opening.
Almost there!
Step 10: Turn, Press & Topstitch

Clip all four corners of your cover
Carefully turn your binder cover right side out through the opening you left. Use a blunt tool, like a chop stick, point turner, or knitting needle, to gently push out the corners for a crisp finish.
Before pressing, make sure your pocket pieces are facing inward so they're touching the lining.

Don't worry if your binder cover looks a little wrinkled or distorted after turning it right side out, that's completely normal! A good press with your iron will smooth everything out and bring your project back to life.


Once everything is nice and flat, press your opening closed and topstitch around the entire binder cover about 1/8" from the edge. This final step closes the turning opening while giving your binder a clean, professional finish.

You’re Finished!
Slide your binder inside the pockets…
Stand back…
And admire your work.

What started as an ordinary office supply is now something completely unique.
Whether you’re heading back to school, organizing recipes, planning your next quilt, or keeping work notes together, your new binder cover is ready to go.
Show Us Yours!
We’d love to see how you made this project your own.
Tag @Necchi.us on Instagram or Facebook and use #NecchiSewInStyle for a chance to be featured.

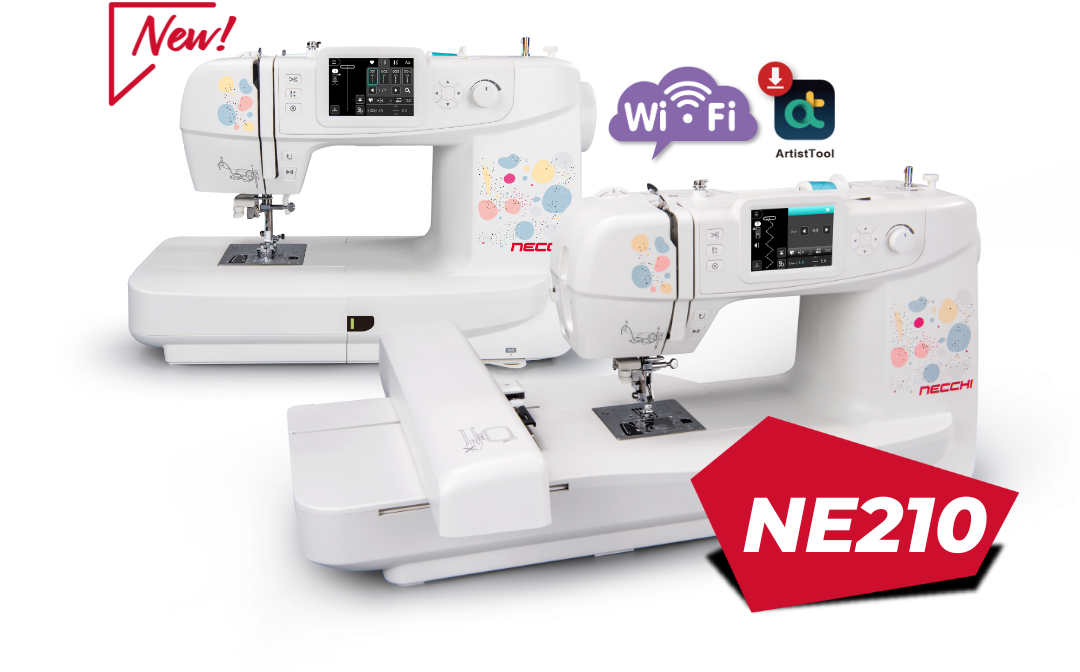
Explore the NECCHI NE210
SEW IT WITH NECCHI
Bring More Creativity to Every Project with the NE210
The NECCHI NE210 Sewing and Embroidery Machine makes it easy to move from everyday sewing to personalized embroidery, decorative details, appliqué, monograms, and more—all on one versatile machine.
- Two included embroidery hoop sizes
- 100+ built-in embroidery designs
- Artist Toolkit embroidery software included
- Color touchscreen with built-in stylus
- Wireless design transfer—no USB required
- Sewing, embroidery, and decorative stitch capabilities
From customizing your binder cover to creating your next one-of-a-kind project, the NE210 gives you even more ways to make every stitch your own.
Explore the NE210Share


