

Home
•
Sew in Style
•
DIY 3-Hole Binder Zipper Pouch | Beginner’s Guide to Sewing Zippers & Zipper Tabs

DIY 3-Hole Binder Zipper Pouch | Beginner’s Guide to Sewing Zippers & Zipper Tabs
Learn to Sew Zippers, Create Professional Zipper Tabs & Stay Organized with This Beginner-Friendly Project
Whether you’re heading back to school, organizing your office, or simply looking for a fun weekend sewing project, this DIY 3-hole binder zipper pouch is a practical project you’ll use again and again.
In today’s Sew in Style tutorial, we’re taking one of the most intimidating sewing techniques, installing a zipper, and breaking it down into simple, beginner-friendly steps.
Along the way, you’ll also learn how to make zipper tabs, a small detail that gives zipper bags a beautifully finished, professional appearance while making them easier to sew.
We’ll be making today’s project on the NECCHI NC-59QD, a compact yet surprisingly feature-packed sewing machine that’s perfect for sewists of all skill levels. Its included zipper foot, adjustable needle position, stitch width adjustments, speed control, and smooth stitching make techniques like zipper installation feel much less intimidating.
By the time you’re finished, you’ll have a fully lined binder pouch and several new sewing skills you can use on countless future projects.
Download the Free Project Guide
Before we begin, download the printable project guide!
Your free download includes:
✔ Complete cutting measurements
✔ Printable supply checklist
✔ Quick-reference sewing instructions
✔ Beginner zipper tips you’ll use again and again
Enter your email below and we’ll send it straight to your inbox!
Finished Size
Approximately 10” × 5½” with a 9” zipper opening.
Materials
You’ll need:
- Quilting cotton for the outer fabric
- Quilting cotton for the lining
- 12” nylon zipper
- Fusible fleece or fusible interfacing
- Iron and ironing board
- Fabric marking tool
- Wonder Clips or pins
- Point turner (optional)
- NECCHI NC-59QD Sewing Machine

Before You Begin
Take a few minutes to prepare your fabrics before heading to the sewing machine.

Fuse your interfacing to the wrong side of your outer fabric pieces, centering it so approximately ¼” of fabric remains around each edge. This small border helps reduce bulk in the seams and creates a cleaner finished pouch.
If you’re using quilting cotton, pressing each piece before sewing will also help improve accuracy throughout the project.
Once you’ve downloaded the printable pattern and cut all of your pieces, you’re ready to begin!
💡 Beginner Sewing Tip
Don’t let zippers intimidate you!
Once you learn how to install one, you’ll be surprised how many projects become possible, from pouches and totes to handbags and cosmetic bags. Today’s project is a great place to build that confidence.
Step 1: Create Professional Zipper Tabs
One of my favorite ways to elevate a zipper pouch is by adding zipper tabs.
Are they required?
Not at all.

But they create clean corners, hide the raw zipper ends, and make your finished projects look much more polished.

Starting with a zipper that’s at least 12” long, mark the beginning and ending of your desired zipper opening, leaving approximately 9” of usable zipper between your marks.

Place one zipper end on top of a lining square with the zipper facing up. Position the fabric so the edge sits slightly beyond your marked line. Place the matching outer fabric square on top, right sides together, sandwiching the zipper between the fabrics.

Clip or pin everything in place, keeping your pins parallel to the zipper teeth with the balls of the pins facing inward. This simple trick keeps your zipper foot from bumping into the pins while sewing.

Sew around three sides of the square using a ¼” seam allowance, being careful not to stitch through the sides of the zipper.


Trim away the excess zipper, clip the fabric corners, and remove any extra zipper teeth if needed to reduce bulk.

Turn the tab right side out, gently push out the corners, press flat, and topstitch around the edges.

Repeat for the opposite zipper end.
NC-59QD Feature Spotlight

The included zipper foot makes it easy to sew close to the zipper teeth without the presser foot getting in your way. Combined with the machine’s adjustable needle position, you’ll have much greater control over where your stitches land.
Step 2: Install the Zipper

Place one outer fabric right side up on your work surface.
Lay your prepared zipper right side down along the top raw edge of fabric, aligning the zipper tape with the raw edge.

Now place one lining piece right side down on top, creating a fabric-and-zipper sandwich with the zipper tucked neatly between the two fabrics.

Clip or pin everything together.
Attach the zipper foot to your machine and sew as close to the zipper teeth as possible.

Once sewn, open the fabrics so the outer and lining pieces are wrong sides together with the zipper extending from the top edge. Give everything a quick press or finger press before moving on.

Place your remaining outer fabric piece right side down on top of the free side of the zipper, carefully aligning the long raw edge with the zipper tape.

Flip the project over and place the remaining liner piece right side down on the opposite side of the zipper, again aligning the raw edge with the zipper tape. Clip or pin all the layers securely.
Sew this second side just as you did the first, stitching as close to the zipper as possible. If the zipper pull gets in the way, stop with your needle down, lift the presser foot, slide the zipper pull behind the foot, then continue sewing.

When both sides are attached, open the pouch so the zipper runs neatly down the center with one outer fabric and one lining fabric on each side.


Finally, topstitch along both sides of the zipper.
Sewing Tip
If your outer fabric and lining are different colors, try winding a matching bobbin for your lining.
Using one thread color on top and another in the bobbin helps both sides of your project look beautifully finished.
Step 3: Create the Binder Ring Loops

Fold each strip lengthwise, pressing the raw edges toward the center before folding again to create neat fabric tabs.

Sewing Tip: Try Chain Piecing!
Since all three binder tabs are sewn exactly the same way, this is a great opportunity to practice chain piecing.
Instead of stopping to cut your threads after each tab, simply begin sewing the next tab immediately after the previous one, leaving just a few stitches of thread between them. Once you've sewn all three, snip the connecting threads apart.
Chain piecing is a favorite time-saving technique used by many quilters and sewists because it keeps projects moving quickly while reducing wasted thread.

Topstitch along both long edges.
NC-59QD Tip

The NC-59QD allows you to adjust your needle position, making narrow topstitching on these small tabs much easier. Moving the needle slightly toward the edge also helps the feed dogs maintain better contact with narrow fabric strips.

Pull the liner away on one side of your pouch.

Find the center of one outer fabric panel by folding the panel in half.


Measure and mark the remaining binder loop positions according to your printable pattern.


Fold each tab into a “U” shape, bring the raw ends together, and clip each loop into position.

Increase your stitch length to create a quick basting stitch that temporarily secures the loops before assembling the pouch.
NC-59QD Feature Spotlight

Need to temporarily hold pieces in place?
Simply increase the stitch length to create an easy-to-remove basting stitch. It’s one of those small adjustments that becomes incredibly useful on projects like this.
Step 4: Assemble the Pouch

Lay the pouch flat with the zipper centered, trim away the excess zipper tabs.

Before sewing anything else, unzip the zipper halfway.
This step is easy to forget—but it’s the only way you’ll be able to turn your pouch right side out later!

Place the outer fabrics right sides together.
Repeat with the lining fabrics.


Clip or pin around the entire pouch.
Sew around all four sides using a ¼” seam allowance, leaving a 2–3” opening along one lining edge.

Clip each corner before turning.

Turn the pouch right side out through the lining opening.


Fold the lining seam allowance inward, press, and stitch the opening closed.
For an invisible finish, you can also close this opening by hand using a ladder stitch.

Push the liner back inside the pouch.
Press the finished pouch one final time.
Congratulations!

Your binder zipper pouch is finished!
Slip the fabric loops over your binder rings, fill your pouch with pens, pencils, sticky notes, or small supplies, and you’re ready to stay organized in style.

🎥 Prefer to Sew Along?
Watch the complete step-by-step video tutorial below as I walk you through every stage of the project, share beginner zipper tips, and demonstrate each technique on the NECCHI NC-59QD.
✂️ What You Learned
By completing this project, you’ve learned how to:
- Install a zipper using a zipper foot.
- Create professional-looking zipper tabs.
- Topstitch beside a zipper.
- Make binder ring loops.
- Sew and turn a fully lined zipper pouch.
- Use basting stitches to simplify construction.
These are foundational skills you’ll use in countless sewing projects beyond this one!

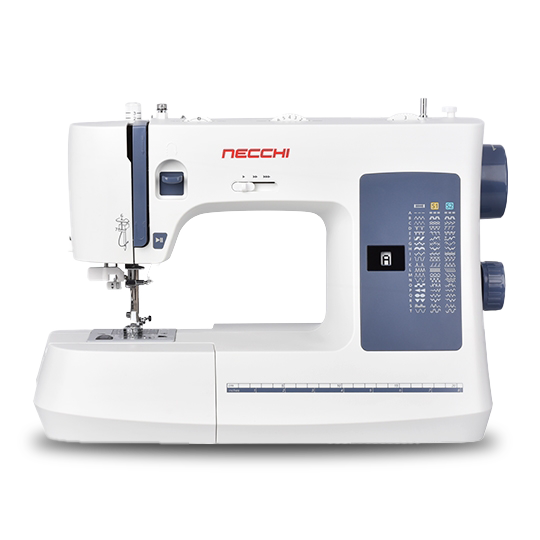
Featured Machine
Meet the NECCHI NC-59QD
The NECCHI NC-59QD makes projects like this binder zipper pouch approachable for beginners while offering features you'll continue to appreciate as your sewing skills grow.
From installing zippers with the included zipper foot to creating clean topstitching with adjustable needle positioning and stitch settings, it's designed to help you sew with confidence from your very first project.
- ✓ Included zipper foot
- ✓ Adjustable needle position
- ✓ Adjustable stitch width & length
- ✓ Variable speed control
- ✓ Built-in needle threader
- ✓ Up to 1,000 stitches per minute
Frequently Asked Questions
Can I sew this pouch without interfacing?
Absolutely! The pouch will simply have a softer, more flexible finish.
Do I have to add zipper tabs?
No—but zipper tabs create cleaner corners, hide raw zipper ends, and make zipper installation easier on many bag projects.
Does the NECCHI NC-59QD include a zipper foot?
Yes! Every NC-59QD includes a zipper foot, making it easy to sew close to zipper teeth. If you plan to sew invisible zippers in the future, an optional invisible zipper foot is also available.
What’s the best zipper for beginners?
A standard nylon coil zipper is the easiest to sew, trim, and customize for projects like this.
Can I personalize this pouch?
Of course! Before cutting your outer fabric, add embroidery, appliqué, decorative stitching, or a monogram. If you’re using the NECCHI NE210 Sewing & Embroidery Machine, it’s easy to stitch names, school subjects, or custom designs for a truly one-of-a-kind project.
Share


